Developing for Raspberry Pi using IntelliJ Deployment
So a few days ago I published the Thermal-Kotlin library which allows use of thermal printers in conjunction with a Raspberry Pi. That library and the way I developed it will get its own article soon, but I wanted to pick out one part that was particularily interesting for me: Automatic Deployment using IntelliJ.
When prototyping the library, I had to run it on the Raspberry Pi often, in order to figure out the exact workings of the protocol used by the printer and even try out timings that wouldn’t prevent the printer’s buffer from overflowing. At first I tried running IntelliJ on the Raspberry Pi to little success (unfortuantely the Pi isn’t nearly beefy enough to run a fully fledged IDE at a comfortable speed), but I didn’t want to miss out on all the great autocompletion and refactoring features that I have become so used to in IntelliJ.
So, I searched for a way to write code on my Macbook, and execute it on the Raspberry Pi. I quickly found that the Deployment functionality in IntelliJ IDEA Ultimate is the ideal way to achieve this.
Remote Deployment is an IntelliJ IDEA Ultimate feature. If you’re a student, check out jetbrains.com/student and grab a free Ultimate license! 👨🏻🎓
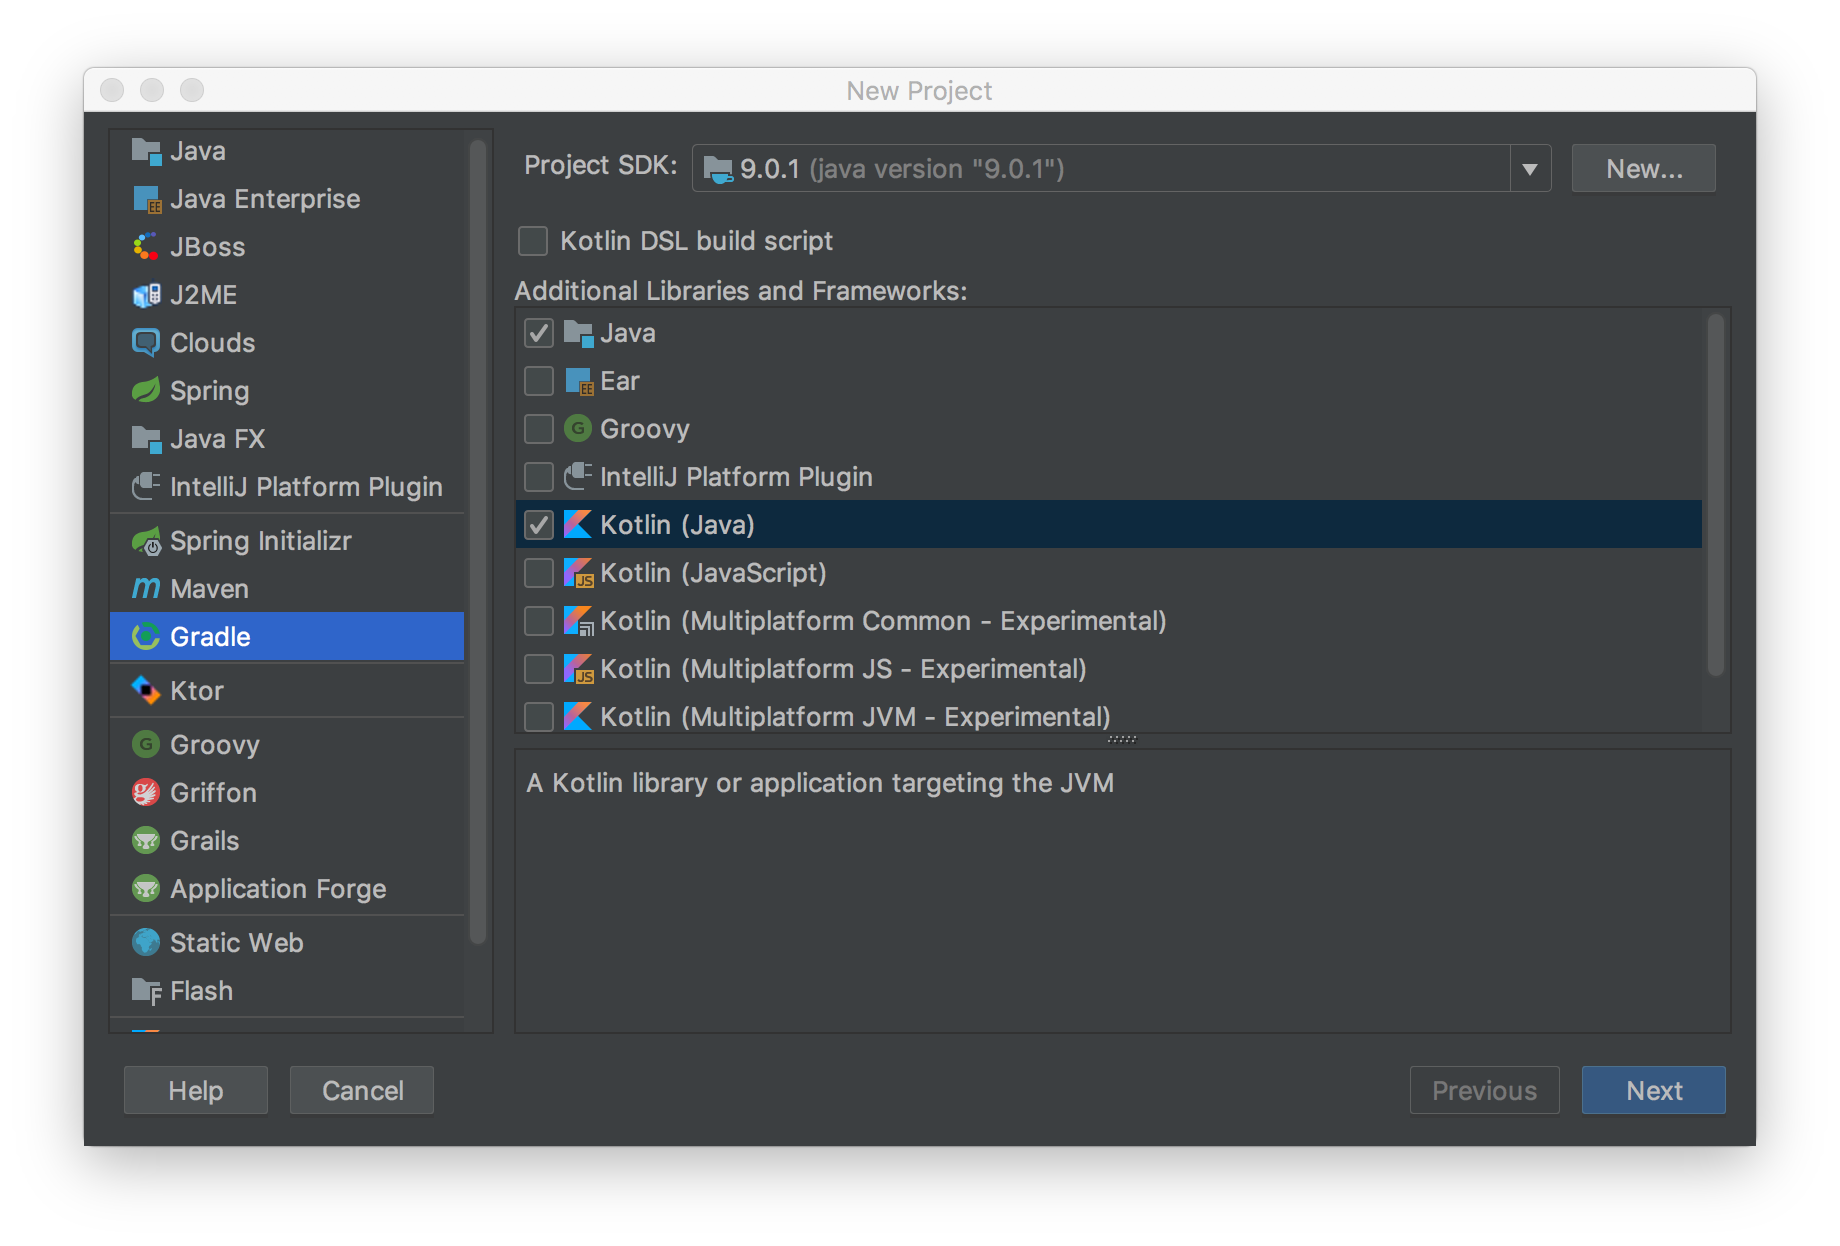
We will be using Kotlin and Gradle for the project. With a few adjustments, it should be no problem to get a similar setup with a different language of your choice!
I have used the Raspbian installation that comes with the NOOBS SD card. If you have a different operating system, some of the commands illustrated might differ slightly.
For the example, we will create a simple Hello Pi application that we will write completely on our workstation, and automatically deploy to our Raspberry Pi whenever we change code. This way, our test cycles become shorter and we can increase our productivity.
Setting up the Kotlin/Gradle Project for Easy Execution
In order to make our lives a bit easier down the line, we create our project using Gradle. This means that we will be able to use the Gradle wrapper gradlew which will make life on the Pi easier for us. Since Kotlin is my favorite JVM language, I will also set it up accordingly.
We create the project as usual, giving it a GroupId and ArtifactId that is to our liking.
 As soon as you click finish, Gradle will start downloading all your dependencies.
Since our example doesn’t focus on any application logic, but rather the configuration, we can simply create a small Hello.kt script in the src/main/kotlin directory so graciously provided by our IntelliJ.
Typing psvm (a handy shortcut for generating the public static void main from Java or its Kotlin equivalent fun main) and filling out the blanks with little creativity leaves us with:
fun main(args: Array<String>) {
    println("Hello Pi!")
}
…and that already concludes the coding part of the tutorial! 😉
We also want to tell Gradle that our main method should be called when we execute the run task in gradle. Thankfully, Gradle provides a plugin called application which makes this super easy. So, add to your build.gradle file the following snippet:
apply plugin: 'application'
mainClassName = 'HelloKt'
This tells Gradle that the run task executes the application by invoking the main method from the (auto-generated) HelloKt class stemming from the equally named .kt file.
Now that our project is ready to be run via Gradle, let’s configure our IDE so that whenever a change is made to the local code, this change is automatically transferred to the device we actually would like to run it on, i.e. the Raspberry Pi.
Setting up Automatic Deployment
Now that we have our local project set up and ready to go, it’s time for us to configure IntelliJ so that changes to the files will be automatically synchronized with the files on the Raspberry Pi.
It is important to check that you can connect via SSH to your Raspberry Pi, as otherwise none of the steps below will work. If you’re not sure about how to set up SSH, consult the official tutorials.
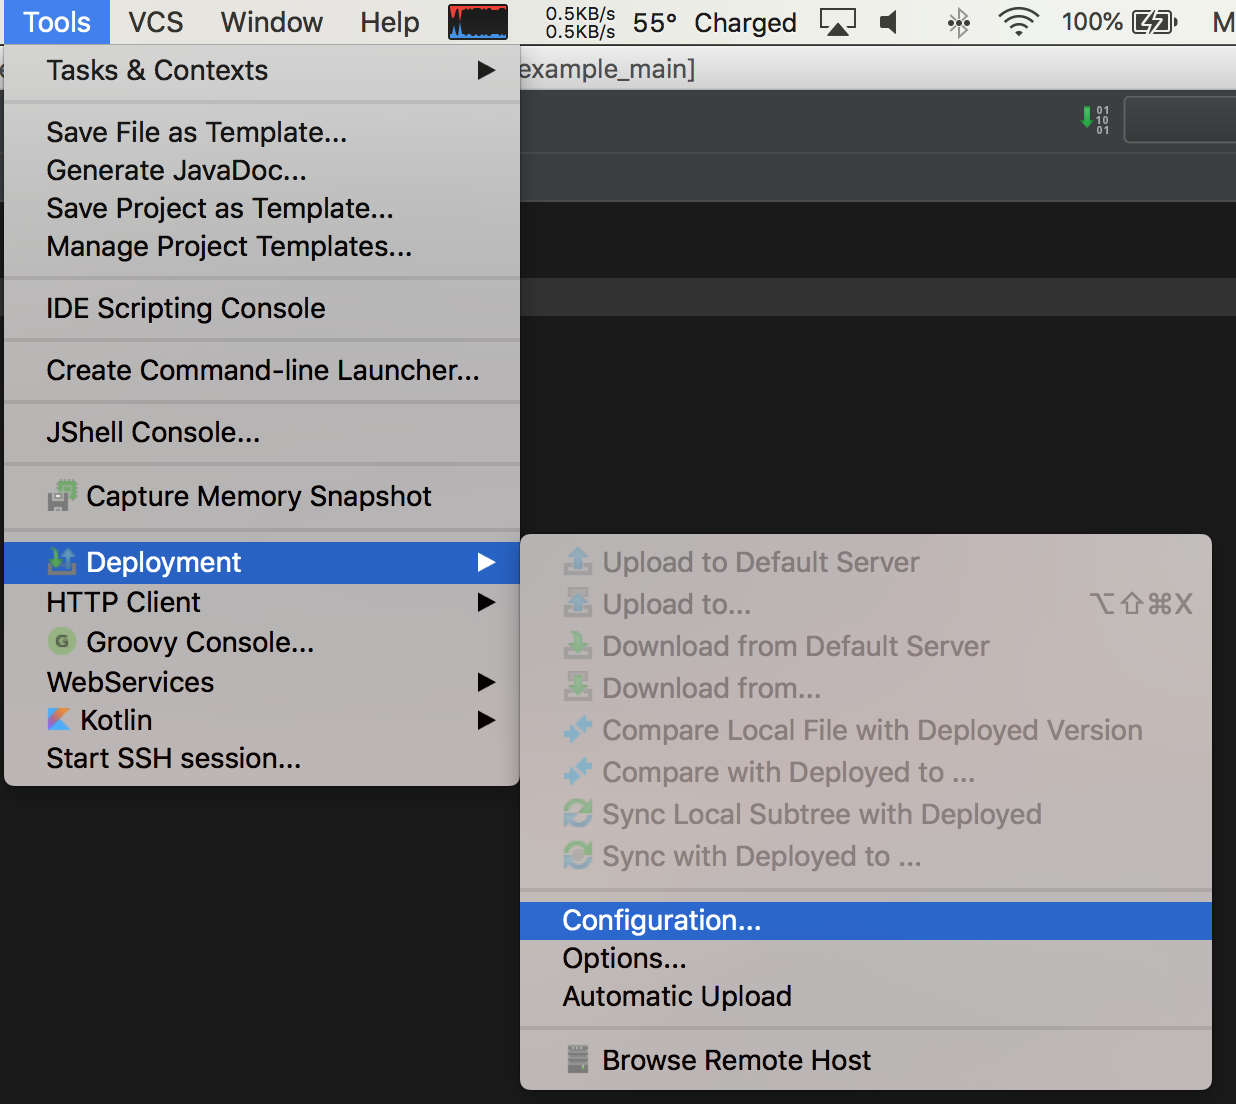
In order to automatically deploy to the Raspberry Pi, we set up a Deployment Configuration by selecting the corresponding menu item in the Tools bar.
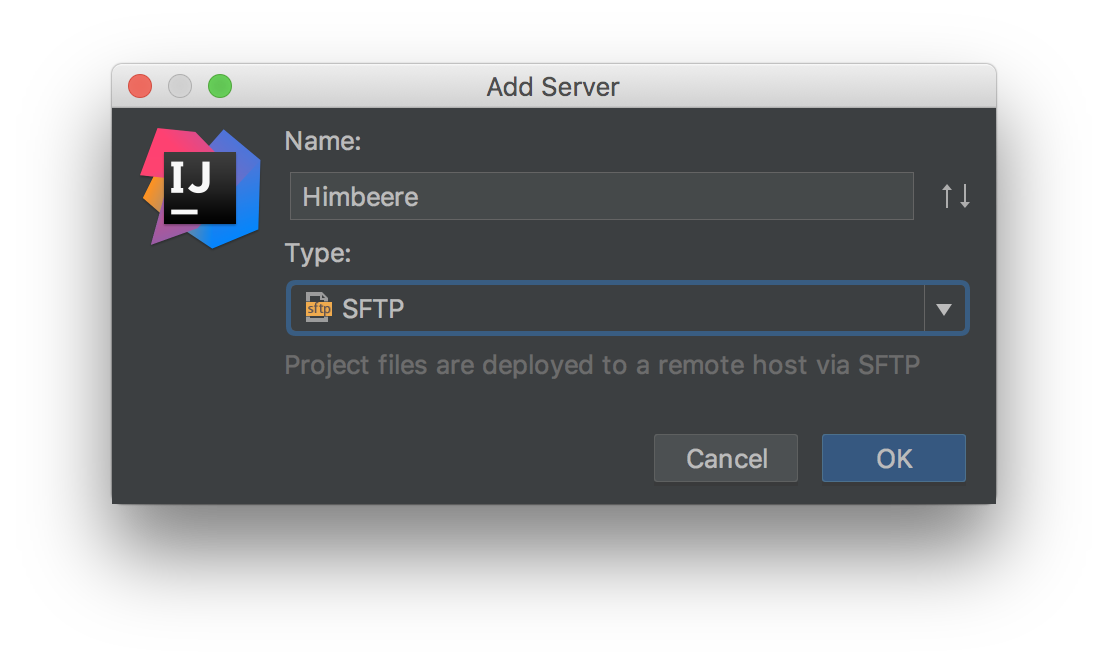
We click the + icon to generate a new configuration, give it an apt and ideally punny name, and choose SFTP as type:
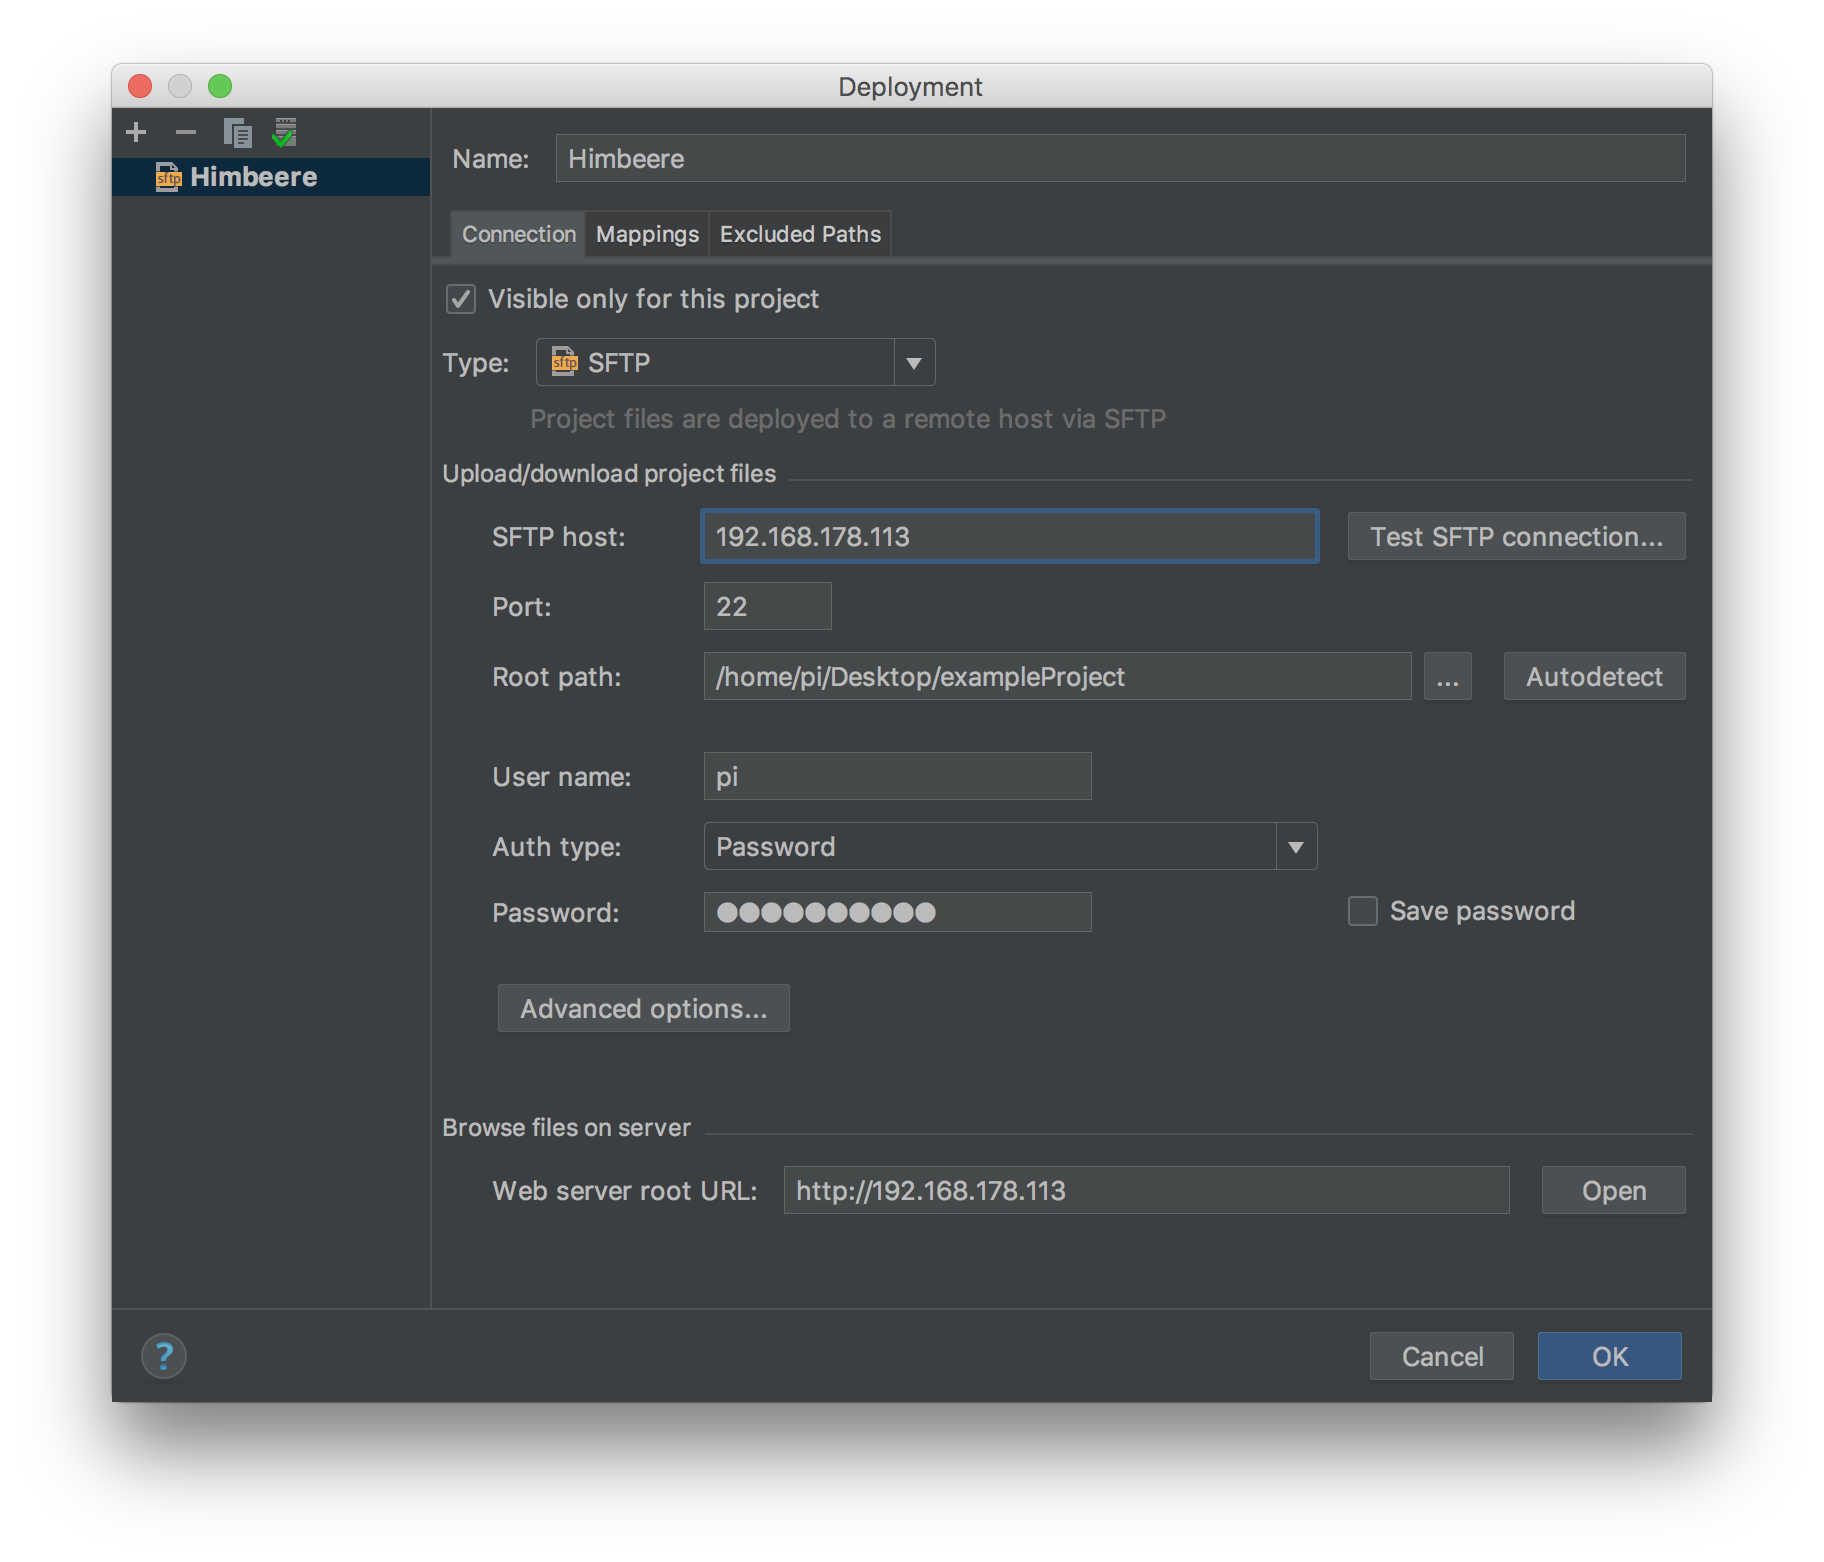
Set up the config as you would expect. You can set up a root path either by typing out what you want the path to be (though it should already exist on the target system), or click on the triple-dots (ideally after filling out the authenticiation section).
Before continuing the configuration for the mappings, hit the ‘Test SFTP connection’ to make sure that stuff works well. Unless you’re working with an actual webapp, you can ignore the Web Server Root URL part for now.
If you have validated that your connection works fine, we can move on to the Mappings tab.
Now, due to the way the application is structured, we need three mappings. IntelliJ is rather helpful after filling out the most straightforward mapping:
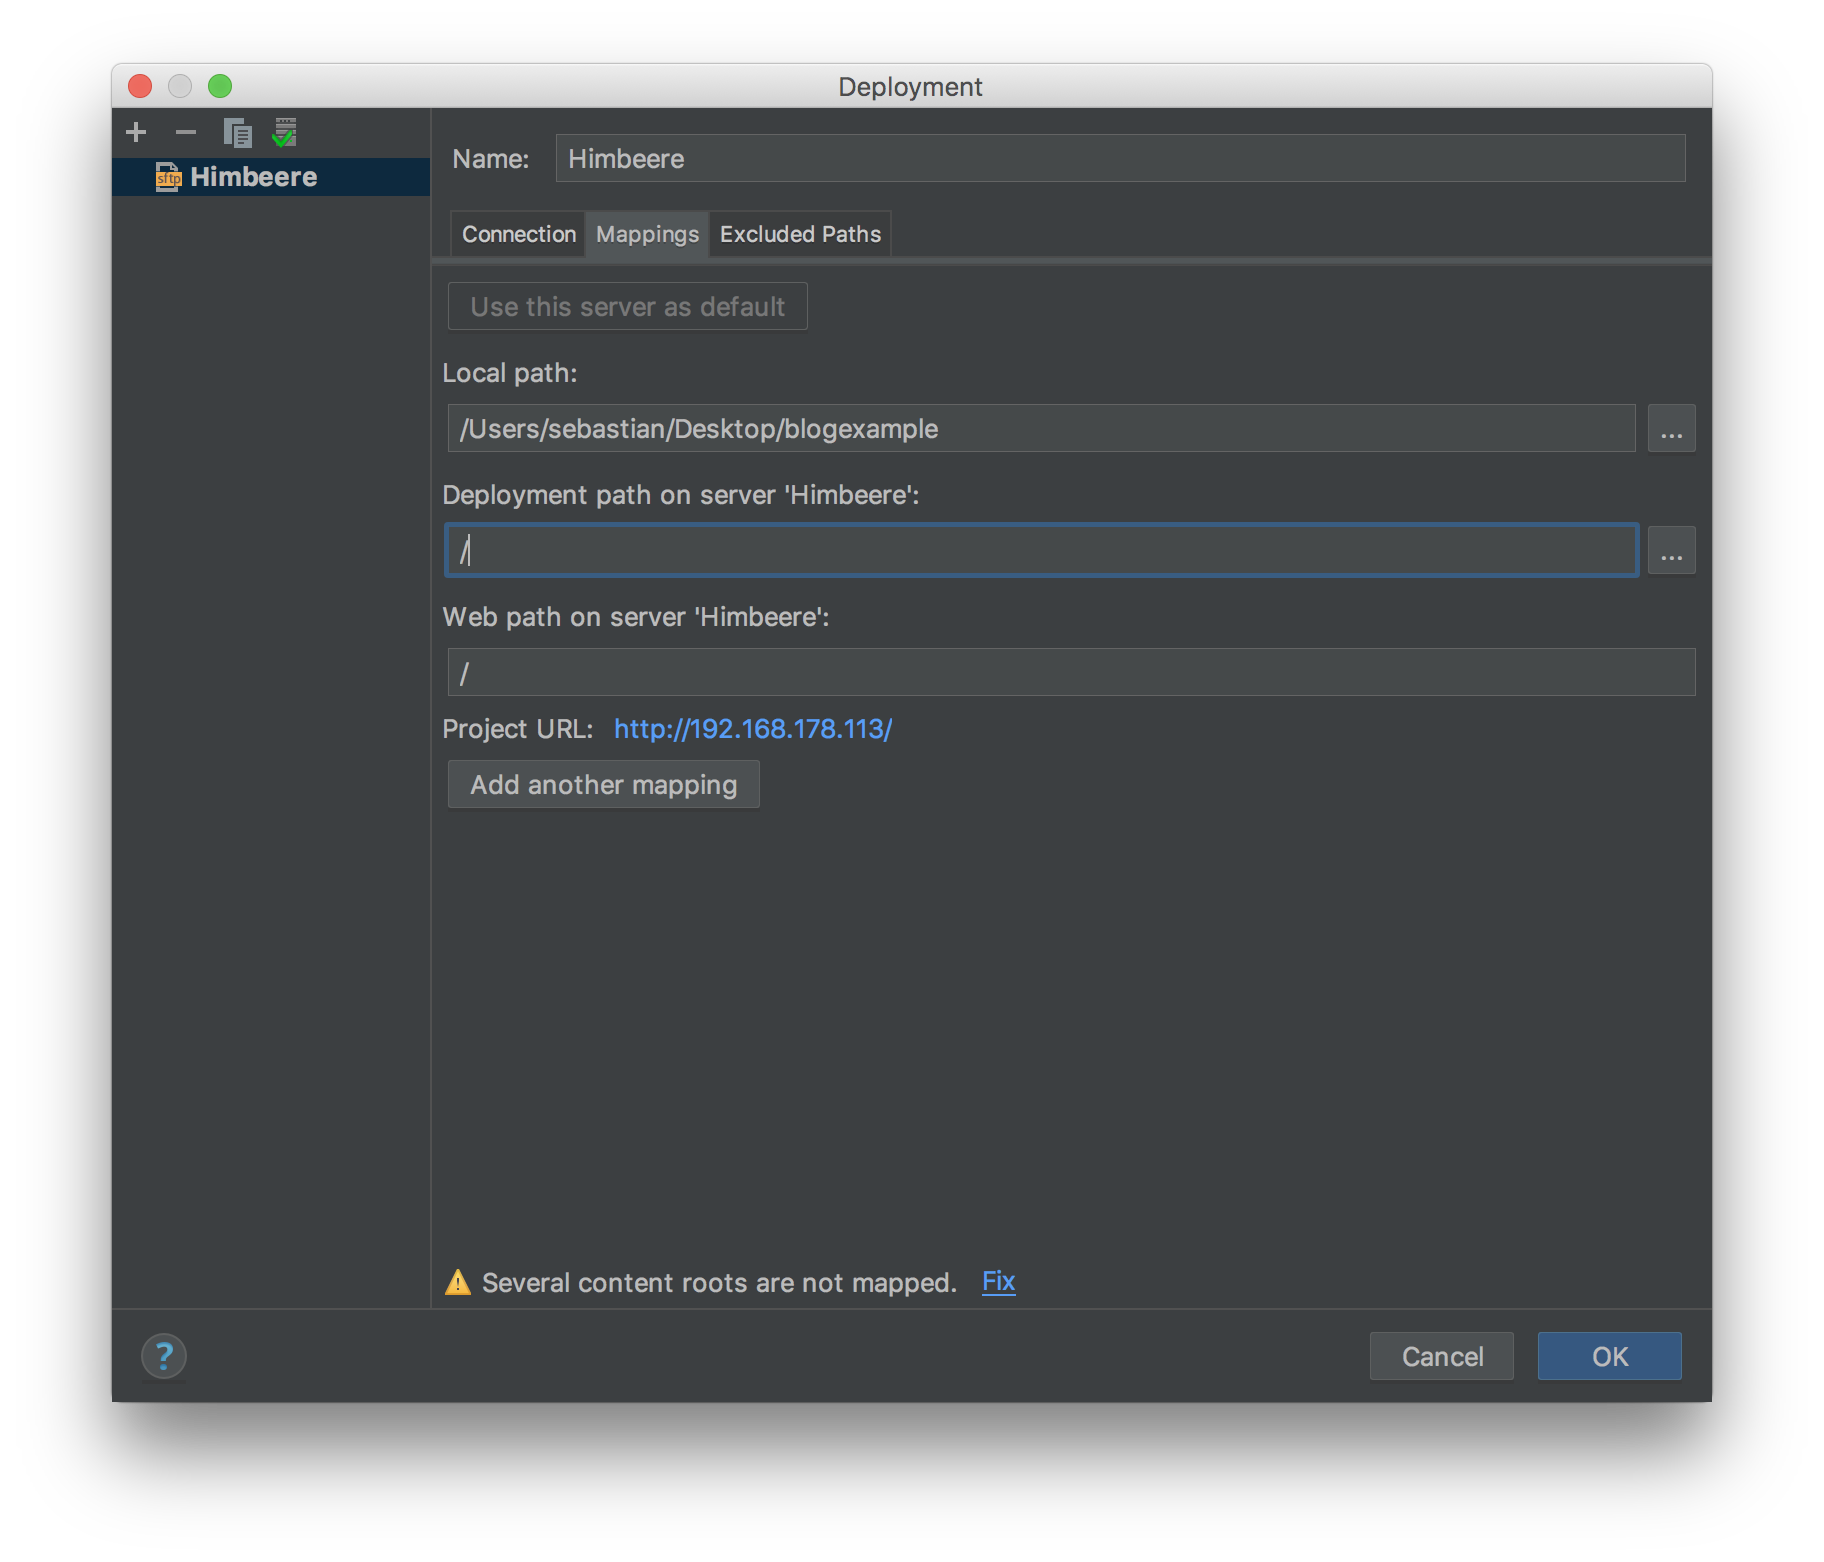
Press the little Fix button on the bottom to auto-generate the unmapped configurations, and fill them out in the most straightforward way imaginable:
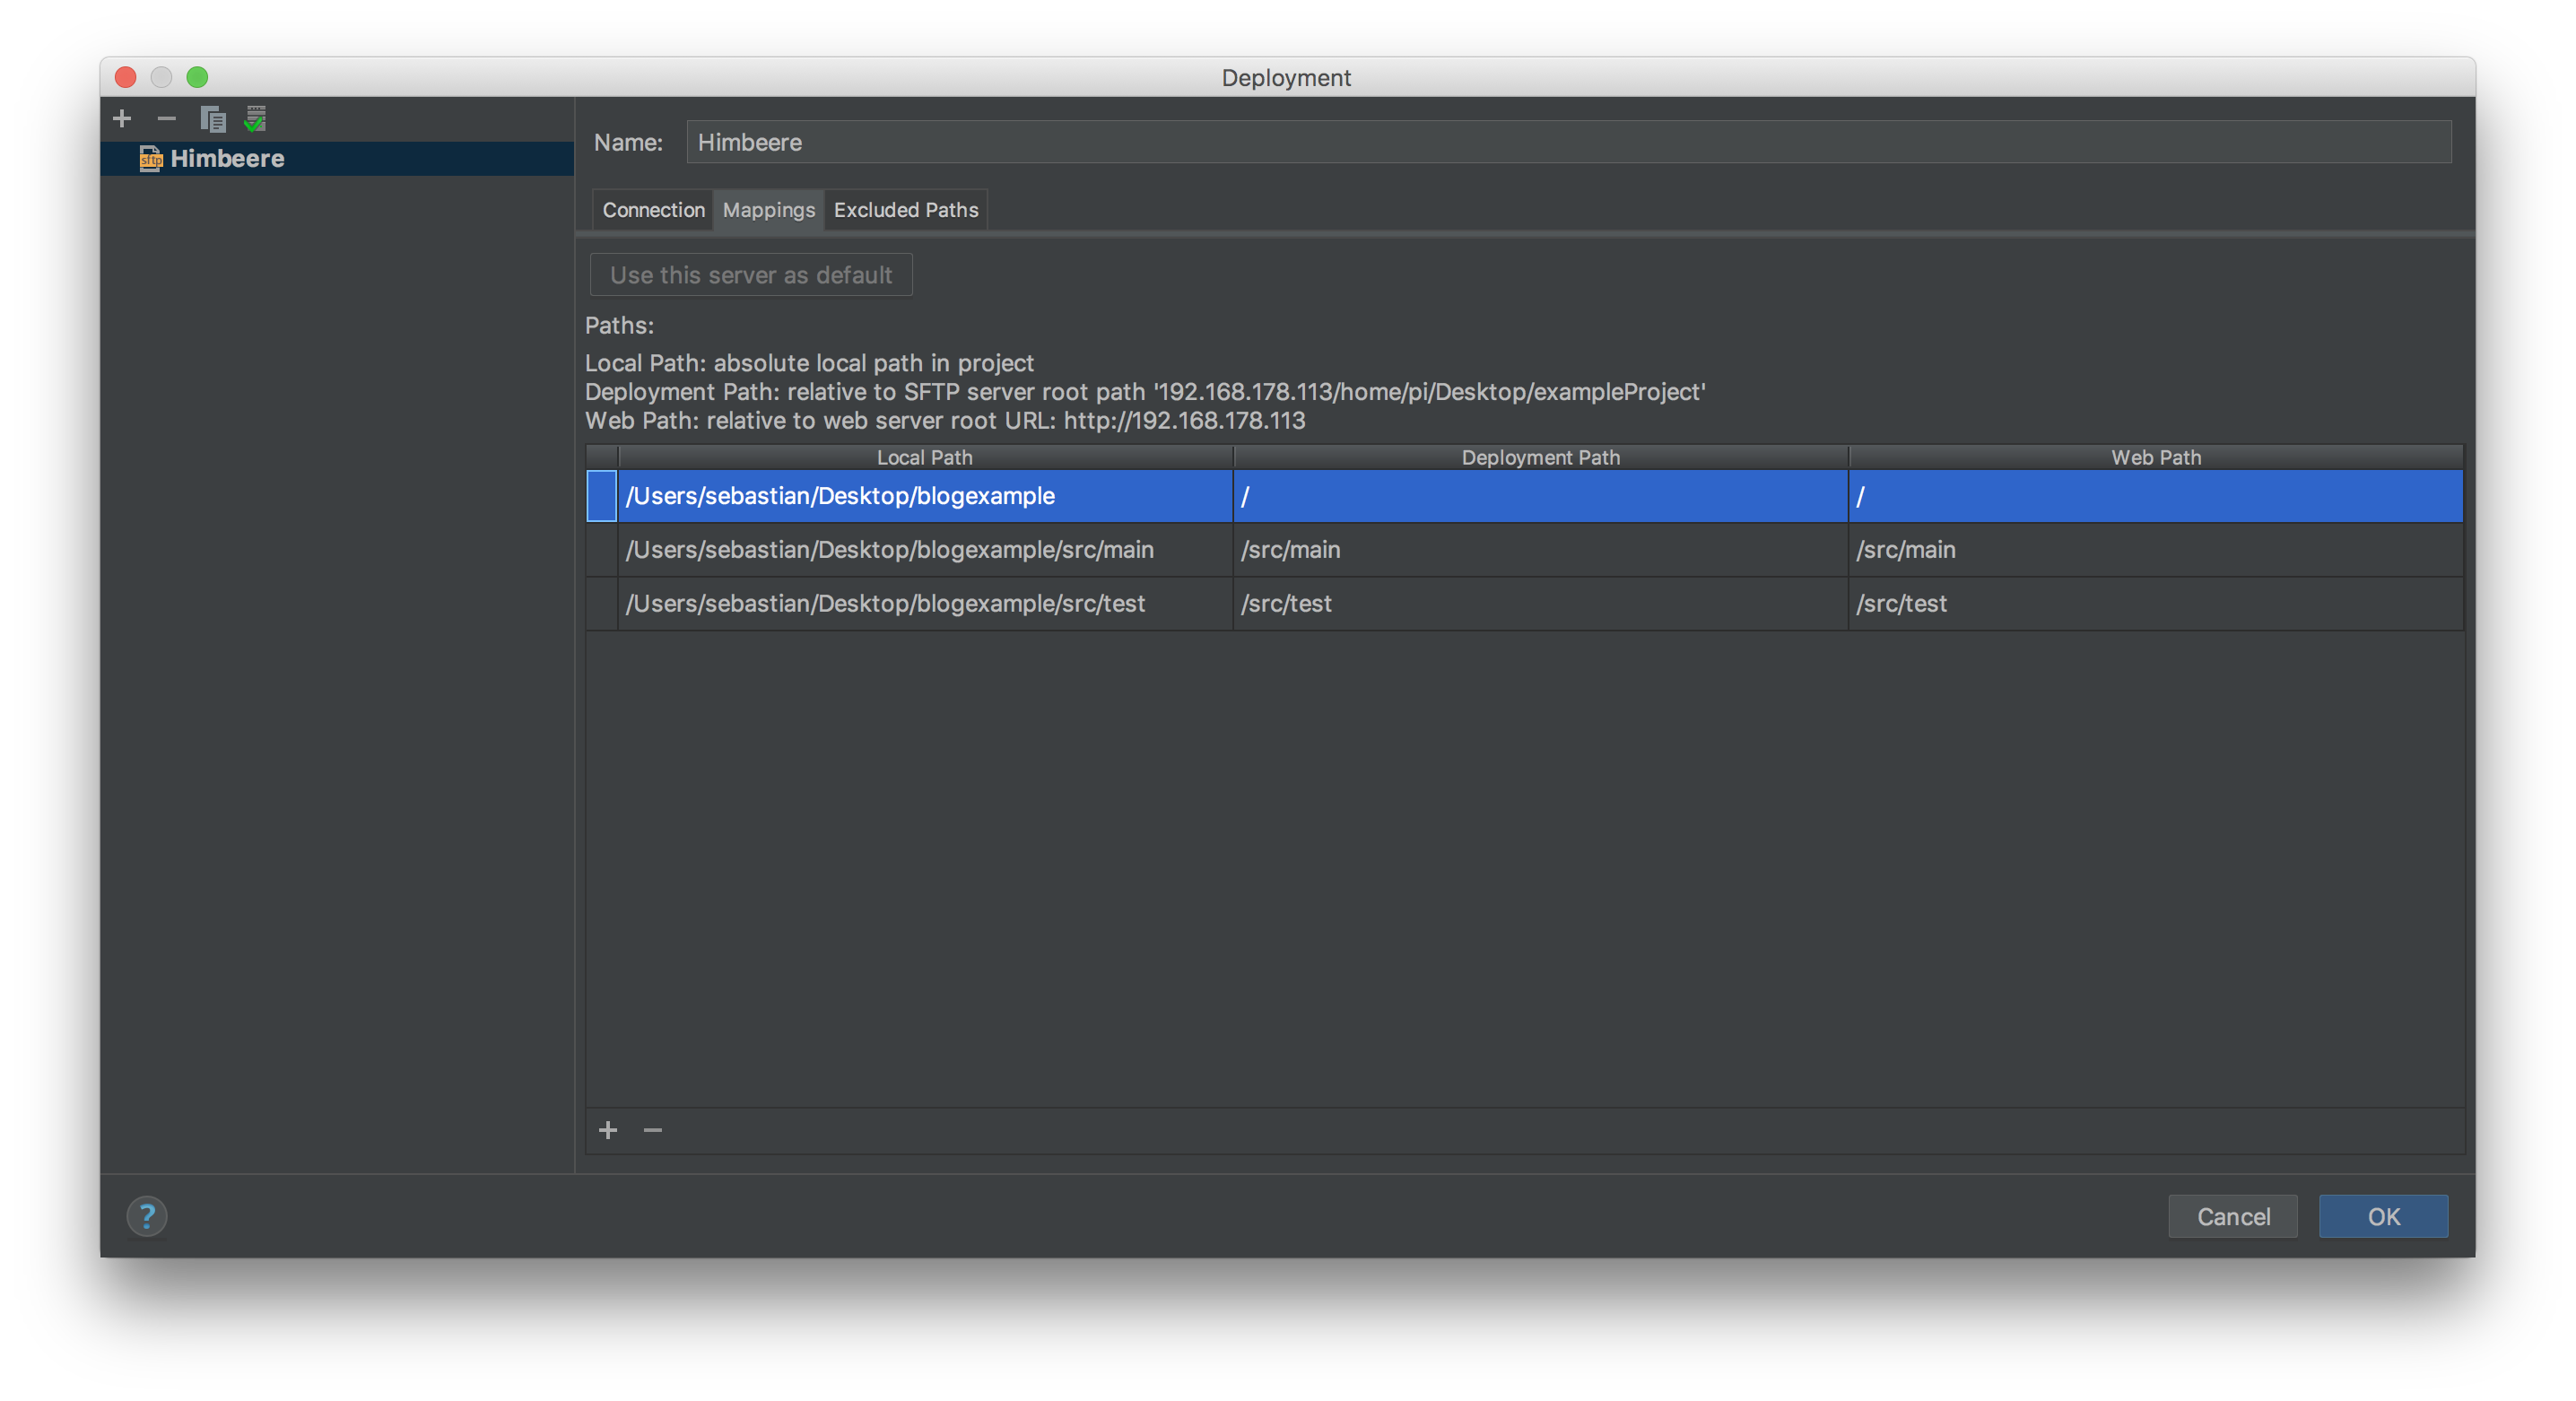
If you’ve filled everything in correctly, you shouldn’t see any warnings at the bottom of the page. And hey, that’s actually the biggest part of the configuration done!
Hit ‘OK’ and take a moment to celebrate your achievement.
Testing Deployment
We can try out the magic we have just set up by right clicking the root of our project in the explorer and choosing Deployment/Upload to….
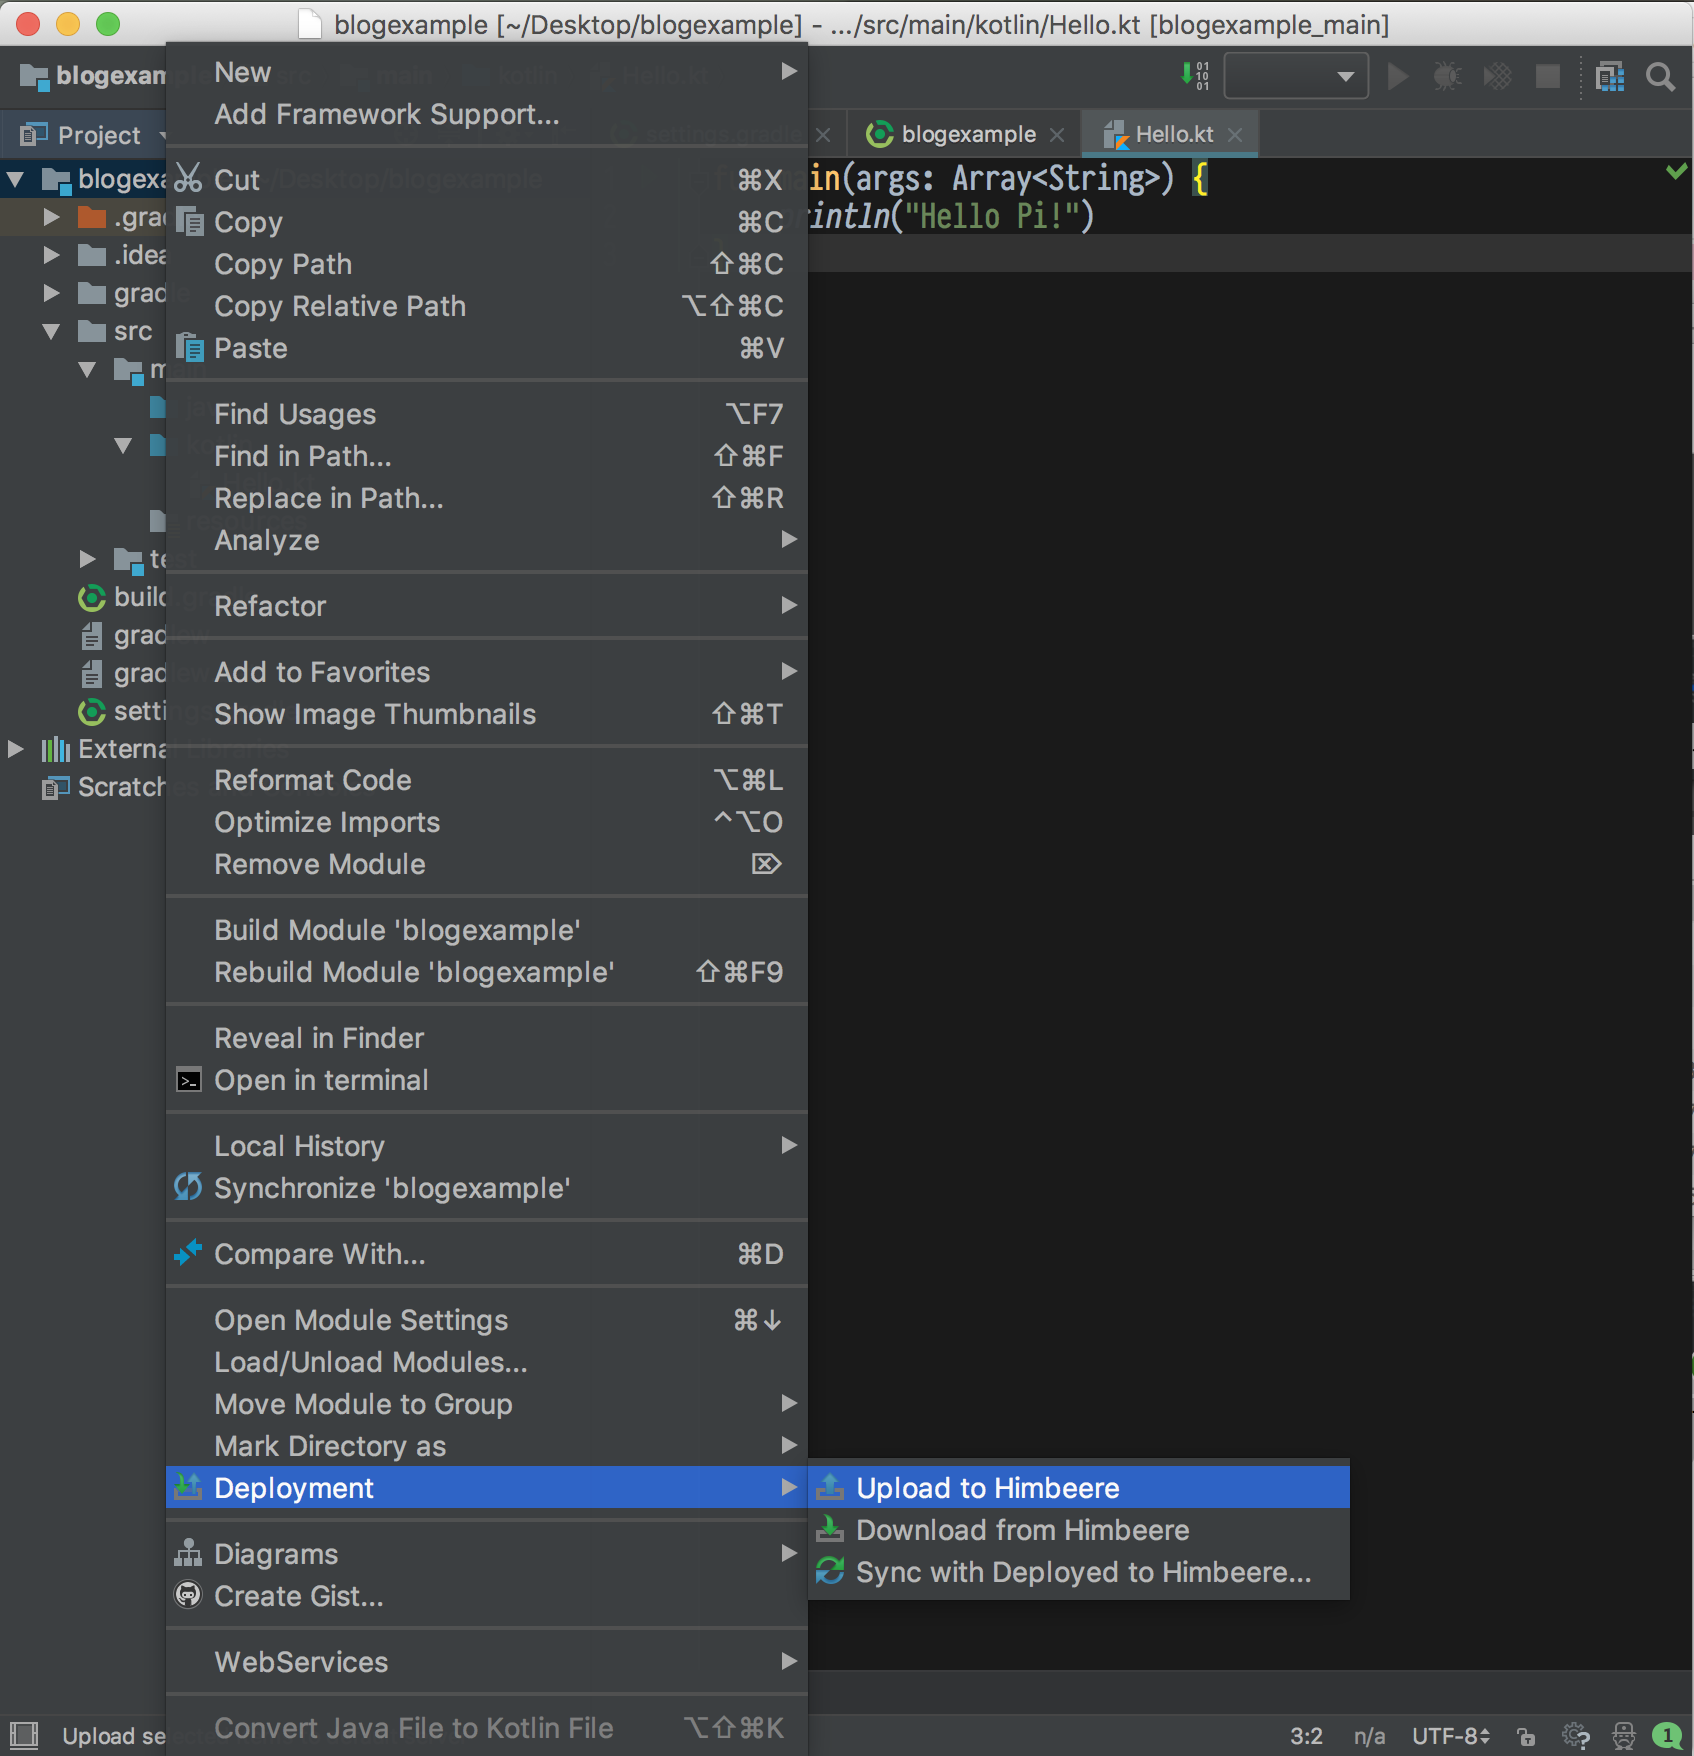
If everything has been done right, the in-application console will happily acknowledge success:
[13/08/2018, 17:21] Upload to Himbeere
[13/08/2018, 17:21] Upload to Himbeere completed in less than a minute: 15 files transferred (232.8 kbit/s)
In case of an error (such as when the path you specified does not exist), we might be greeted with an error message like the one below.
[13/08/2018, 17:20] Upload to Himbeere
[13/08/2018, 17:20] Upload to Himbeere failed: could not change to work directory "/home/pi/Desktop/exampleProject". (No such file)
Changing the path or creating the path on the remote machine fixes this problem.
Automating Deployment
Before we actually execute our application for the first time on the remote host, let’s spare our right mouse button some hard work by automating the upload functionality. Navigate to the Options menu for the Deployment functionality:

Feel free to adjust all of these options to your liking. We are especially looking at Upload changed files automatically to the default server right now. Either choose Always or On explicit save action depending on your preference:
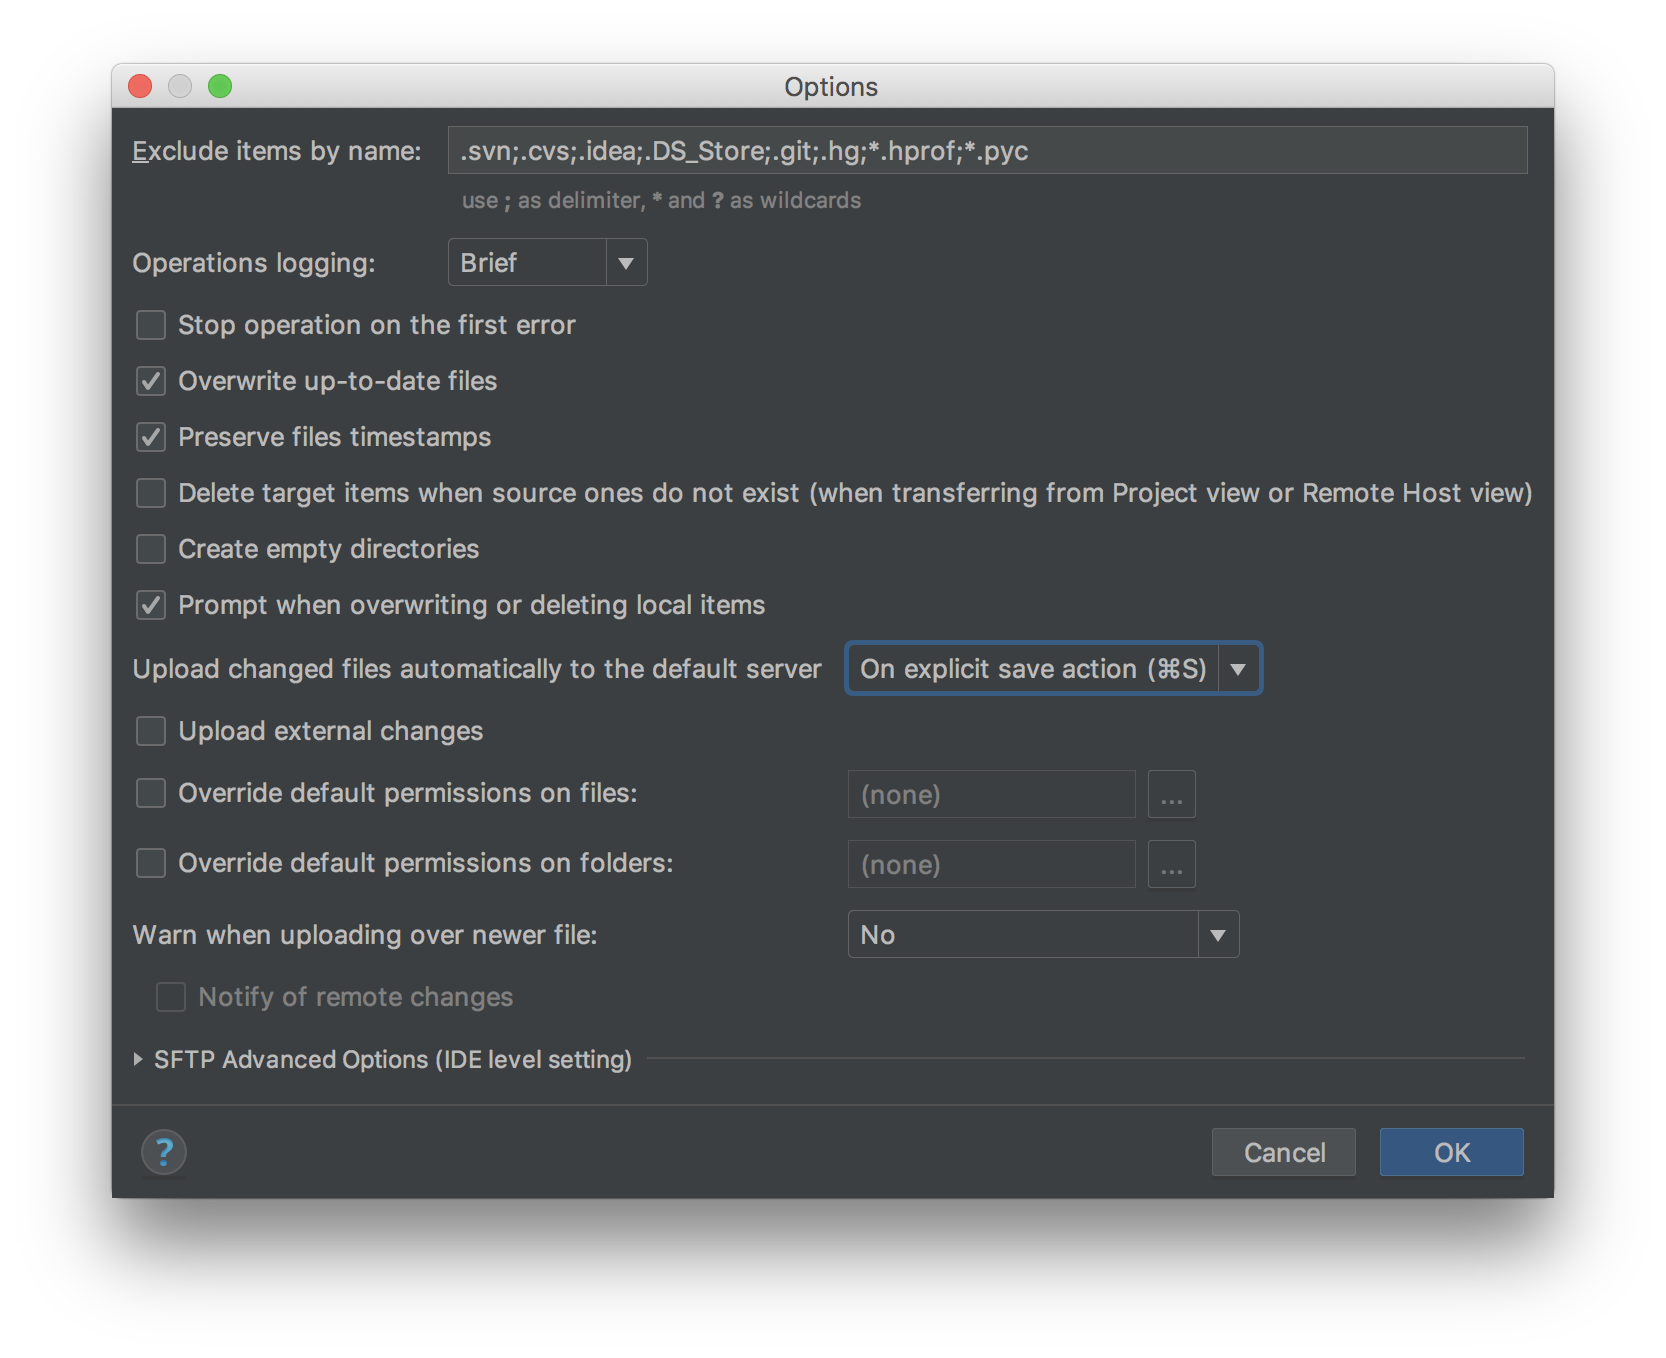
Hit the OK button to save your settings, perform a save action or change some code and watch IntelliJ automatically upload the changes.
Running on Raspberry Pi
Now let’s get our application actually running on the Raspberry Pi. To do this, we go through a few quick steps in a terminal emulator of our choice.
- Connect to the Raspberry Pi using SSH:
ssh pi@himbeere - Navigate to your project folder:
cd ~/Desktop/exampleProject - List the output of the folder:
ls– you should be presented with the same files you see in IntelliJ on your development machine - Alllow
gradlewto be an executable:chmod +x ./gradlew - Execute our application:
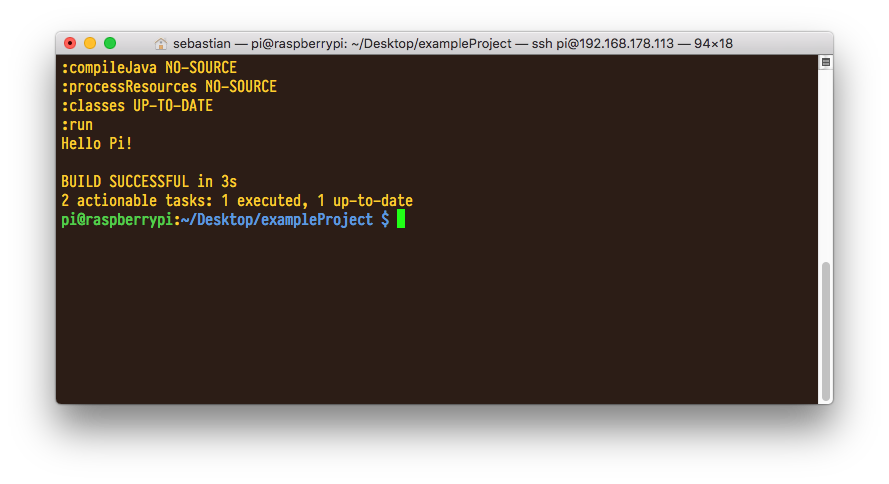
./gradlew run.
The first startup can take a while, as gradlew downloads a gradle distribution and starts up a gradle daemon. Apart from a lot of download bars scrolling by, you should be greeted by your application running successfully!
Conclusion
We have seen that IntelliJ IDEA Ultimate’s Deployment functionality is a great way to keep a project that you develop locally in sync with a (maybe less powered) host system that is connected via network. It serves as a useful tool when access to the other machine is cumbersome, or outright impossible (in the case of server, for example).
I hope that you’re now well equipped to use the Deployment functionality in your next project!